
MazBook.ru
English Русский
Български
Беларускі
Український
Српски
Hrvatski
Română
Polski
Slovenský
Magyar
• Bookmark • Sitemap • Contacts •   
Cars Opel Cars Ford Cars Volkswagen Cars Audi Cars Kia Cars Renault Cars Peugeot


Familia Capella Mazda3 Mazda6 CX-? Others Articles
Capella 3 (1982-1992, petrol) Capella 3 and 4 (1982-1992) Capella 4 (1987-1992) Capella 5 (1991-1997) Capella 6 (1997-2005, petrol)

Checking and cleaning the cylinder block (Mazda Capella GE)

  • Home
  • Mazda Capella
  • Capella GE (1991-1997)
  • Power unit
  • Overhaul engines 1.6 and 1.8
  • Checking and cleaning the cylinder block
0
Contents: Examination ⇓ Cleaning ⇓

Examination


1. Inspect the block for cracks and signs of corrosion or rust. Inspect the block hole threads. If defects are detected, the unit must be repaired or replaced if possible.

2. Inspect the cylinders.
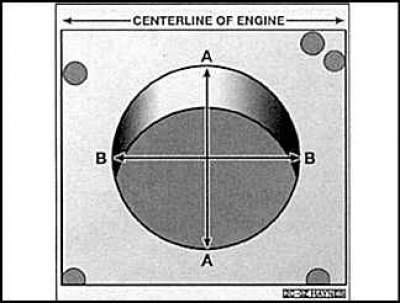
2. Inspect the cylinders.


3. Measure the cylinder diameter perpendicular to the center line (A) and parallel to the center line (B).
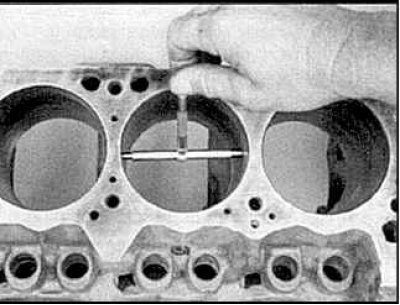
3. Measure the cylinder diameter perpendicular to the center line (A) and parallel to the center…


4. Measure the cylinder diameter with a gauge.
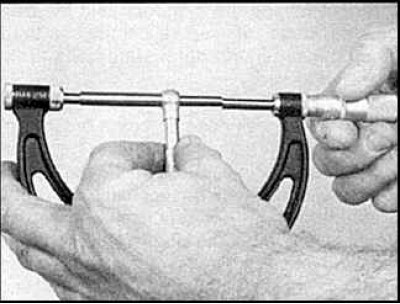
4. Measure the cylinder diameter with a gauge.


5. Measure the length of the gauge with a micrometer.


6. Measure the diameter of each cylinder at the top, middle and bottom, parallel to the crankshaft axis.

7. Measure the diameter of each cylinder at the top, middle and bottom, perpendicular to the crankshaft axis.

8. The taper of a cylinder is calculated as the difference between the upper and lower diameters. Ovality is the difference between parallel and perpendicular measurements.

9. If the results obtained do not match the technical requirements, please contact specialists.
9. If the results obtained do not match the technical requirements, please contact specialists.


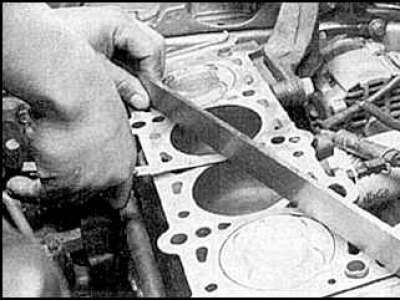
10. Using a ruler and feeler gauges, check whether the surface of the block that meets the head is deformed.

11. Check the wear of the pistons and cylinders using feeler gauges. If you find wear or damage when inspecting the unit, contact a specialist.

Cleaning


Cleaning


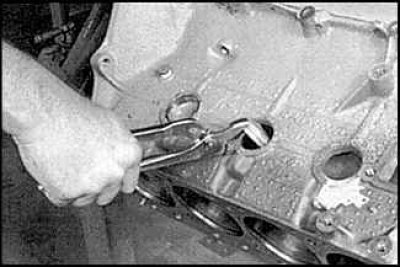
1. Remove the soft plugs from the cylinder block. To do this, use a hammer and a drift to push them into the block, and then remove the plugs from the holes using large pliers.


2. Use a spatula to remove any remaining gasket material from the cylinder block, being careful not to damage the surface.

3. Remove the main bearing caps and lift the bearings out of the block and caps. Write down which cylinder the bearing belongs to, as well as the part from which it was removed (from the cover or cylinder block), put them separately from each other.

4. Using special Allen keys (allen's key) unscrew and remove all threaded plugs from the cylinder block channels.

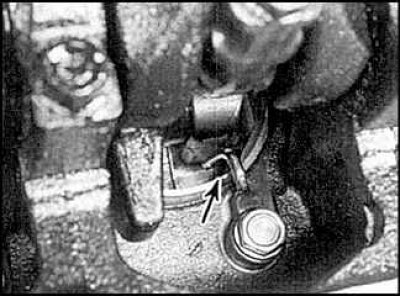
5. If the engine is heavily soiled, it should be taken to a car service workshop to be flushed with a strong jet or in a hot chamber. Almost all auto stores sell brushes for cleaning oil channels and holes. Rinse the internal channels with a stream of warm water until the water runs clear, dry the block thoroughly and lubricate the treated surfaces with oil, which will protect them from corrosion. If compressed air is available, blow out the block and internal passages to speed up the drying process.
5. If the engine is heavily soiled, it should be taken to a car service workshop to be flushed with…


6. If the block is only slightly dirty, it is enough to wash the block with warm water, detergent and a stiff brush. Take your time and do this job thoroughly. Regardless of the cleaning method, thoroughly clean the oil channels and holes, dry the block and lubricate the treated surfaces with oil.


6. If the block is only slightly dirty, it is enough to wash the block with warm water, detergent…


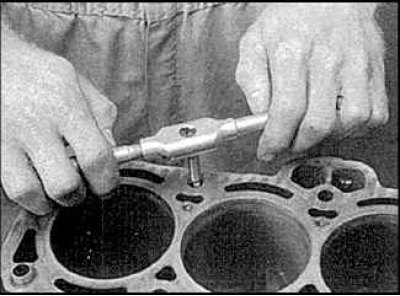
7. The threaded holes in the block should be tapped to ensure correct tightening torque readings during assembly. Tapping will clean the threaded holes from dirt, traces of corrosion and sealant residue, and also restore the threads. If possible, blow out the holes with compressed air to remove any remaining material from the tap.

8. Thoroughly clean the threads of the cylinder head bolts and the main bearing caps.

9. Reinstall the main bearing caps, tightening the bolts by hand.
9. Reinstall the main bearing caps, tightening the bolts by hand.


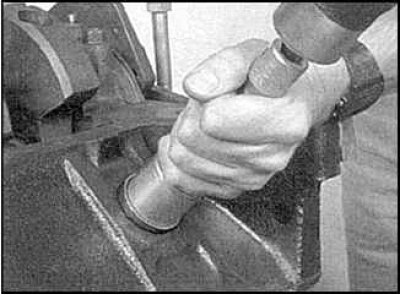
10. Install new plugs into the block, having first lubricated them with high-temperature sealant. Make sure that the plugs are seated correctly and are not distorted. otherwise, leaks may occur.

11. To install the plugs, you will need a special tool, but this operation can be performed with equal quality using a mandrel with a diameter corresponding to the hole in the plug, and a hammer.


12. If the engine will not be assembled at this time, cover the cylinder block with a plastic cover to protect it from contamination.

(Article is based on website data: www.MAZbook.ru)
This article is available at: russian, bulgarian, belarusian, ukrainian, serbian, croatian, romanian, polish, slovak, hungarian
This text was checked by: Evgeny Mereshnikov
Share with friends on social networks:

Previous
Capella 5 » Overhaul engines 1.6 and 1.8
Next

Removal the crankshaft
Removal pistons and connecting rods
Cylinder head assembly
Valve repair
Overhaul and inspection of the cylinder head
Cylinder honing
Checking pistons and connecting rods
Checking the crankshaft
Checking main and connecting rod bearings
Engine assembly procedure
More articles on repairing other Mazda models
Technical characteristics of the cylinder block Mazda Familia 5 (1985-1989)
Checking the cylinder block Mazda3 BK (2003-2009)
Checking the cylinder block Mazda6 GG (2002-2008)
Checking the cylinder block Mazda CX-5KE (2012-2017)
Cylinder Block — Checking, Cleaning and Repairing Mazda BT-50 (1) (2006-2011)
Link in different formats to this article
Comments and feedback from visitors
No comments yet


How much will 43 + 16 ?


Capella 6 (1997-2005, petrol) 
  • General information
  • Introduction to guide
  • User manual
  • Troubleshooting
  • Maintenance
  • Power unit
  • 4-cylinder engines
  • 6-cylinder engines
  • Engine overhaul
  • Cooling and ventilation
  • Power and exhaust systems
  • Engine electrics
  • Control system
  • Transmission
  • Mechanical gearbox
  • Automatic gearbox
  • Clutch and drive shafts
  • Chassis
  • Brake system
  • Car suspension
  • Steering
  • Body
  • Exterior (external elements)
  • Interior (internal elements)
  • Doors, windows and locks
  • Electrical equipment
  • Equipment and devices
  • Electrical circuits
Capella 5 (1991-1997) 
  • General information
  • User manual
  • Maintenance
  • Helpful hints
  • Power unit
  • Petrol engines 1.6 and 1.8
  • Petrol engines 2.0
  • 2.5 petrol engines
  • Overhaul engines 1.6 and 1.8
  • Overhaul engines 2.0 and 2.5
  • Diesel engine 2.0
  • Engine electrics
  • Cooling system
  • Air conditioner
  • Carburetor Nikki 30/34
  • Power system (1.6 and 1.8)
  • Power system (2.0 and 2.5)
  • Control system
  • Transmission
  • Mechanical gearbox
  • Automatic gearbox
  • Clutch and axles
  • Chassis
  • Brake system
  • Suspension and wheels
  • Steering
  • Body
  • Exterior (external elements)
  • Interior (internal elements)
  • Doors and windows
  • Electrical equipment
  • Equipment and devices
  • Electrical circuits
Capella 4 (1987-1992) 
  • General information
  • Introduction to manual
  • Vehicle specifications
  • Power unit
  • Engine repair
  • Lubrication system
  • Cooling system
  • Fuel system (carburetor)
  • Fuel injection (FE)
  • Fuel injection (DOHC)
  • Fuel system (diesel)
  • Ignition system
  • Transmission
  • Clutch
  • Gearbox
  • Drive shafts
  • Chassis
  • Front suspension
  • Rear suspension
  • Steering system
  • Brake system
  • Electrical equipment
  • Equipment and devices
  • Electrical circuits
Capella 3 and 4 (1982-1992) 
  • General information
  • User manual
  • Maintenance
  • Power unit
  • Gasoline engine
  • Engine overhaul (gasoline)
  • Diesel engine
  • Cooling and heating
  • Supply system
  • Ignition system
  • Emission reduction
  • Transmission
  • Clutch
  • Mechanical gearbox
  • Automatic gearbox
  • Drive shafts
  • Chassis
  • Brake system
  • Suspension and wheels
  • Steering
  • Body
  • Exterior (external elements)
  • Interior (internal elements)
  • Electrical equipment
  • Equipment and devices
  • Power devices
  • Electrical circuits
Capella 3 (1982-1992, petrol) 
  • General information
  • User manual
  • Maintenance
  • Troubleshooting
  • Late models
  • Power unit
  • Engine in car
  • Engine overhaul
  • Cooling and heating system
  • Fuel and exhaust system
  • Engine electrical system
  • Emission control system
  • Transmission
  • Mechanical gearbox
  • Automatic gearbox
  • Clutch and drive shafts
  • Chassis
  • Brake system
  • Suspension and wheels
  • Steering
  • Body
  • Exterior (external elements)
  • Interior (internal elements)
  • Electrical equipment
  • Equipment and devices
  • Lighting and lamps
  • Electrical circuits
MazBook.ru © 2018–2026 · Mobile version · Articles and news · Sitemap: EN BG BY UA RS HR RO PL SK HU · Feedback · Site search · Add to bookmarks Familia 5 (BF) · Familia 6 (BG) · Capella 3 (GC) · Capella 3 and 4 (GC) · Capella 4 (GD) · Capella 5 (GE) · Capella 6 (GF) · Mazda3 BK · Mazda6 GG · CX-5KE · Mazda 121 (3) · Mazda BT-50 (1) ·
By continuing to use the site, you agree to the use of cookies 🔐