


Note 1: Broken springs and valve stem seals can be replaced without removing the cylinder head from the engine. This operation will require a few special tools, as well as a source of compressed air, so read the entire paragraph to assess your ability to cope with this job.
Note 2. Not engines manufactured since 1998, before starting the operation, check the clearances in the valves (see chapter 1). since gap adjustment can be combined with this procedure.
1. Remove the camshaft (see paragraph 7). Remove the pushers from the failed valve drive. Store the tappets in the order in which they were installed in the engine. When reassembling, they should return to their original position.
2. Remove the spark plug from the cylinder with the bad valve. If you plan to replace all valve caps, remove all spark plugs.
3. Rotate the crankshaft until the respective piston is at TDC on the compression stroke (see paragraph 3). If all valve caps are to be replaced, start with cylinder #1 and move on to the next cylinders in turn according to the firing order of the cylinders (see technical data at the beginning of this chapter).
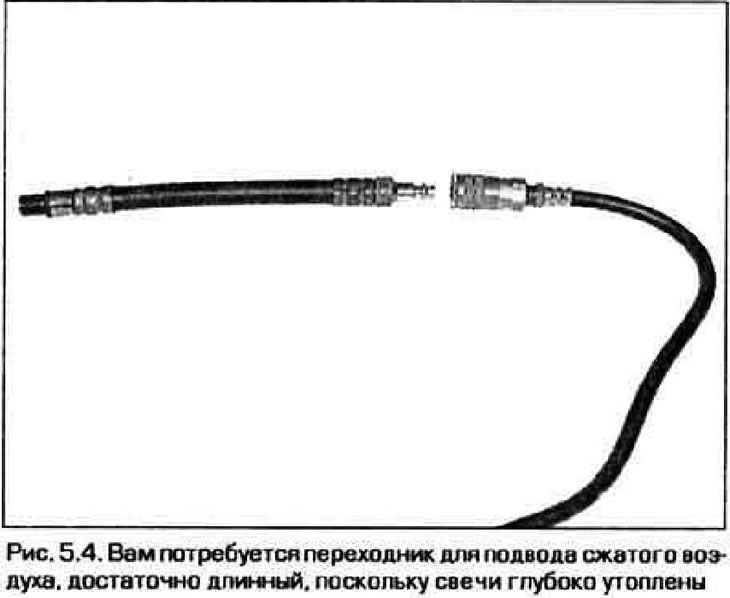
4. Screw a long adapter into the spark plug hole, to the second end of which connect a hose from a compressed air source (pic. 5.4) (the compressed air in the cylinder will hold the valves up until the spring is removed from them).
5. Apply compressed air to the cylinder. Be careful: under the action of compressed air, the piston can go down and suddenly turn the crankshaft. If the key with which you turned the crankshaft. is still attached to the crankshaft shank bolt, turning the crankshaft may cause personal injury or significant damage to the vehicle.
6. Plug all the holes in the cylinder head around the valves with clean rags so that no foreign object falls into the cylinder.
7. Using the tool, compress the valve spring and remove the crackers from the upper spring plate (pic. 5.7).
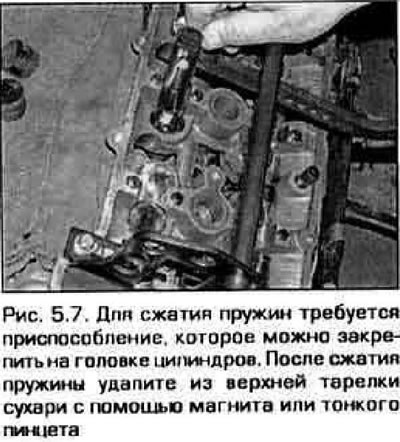
Note. To compress the springs, you will need a special tool that can be fixed in the right place without removing the cylinder head.
8. Remove the top plate, spring and spring washer. Mark the parts or store them so that the set of parts will be in the same place during assembly.
Note. If compressed air does not hold the valve closed during this operation, the valve itself or its seat may be damaged. In this case, the cylinder head will have to be removed.
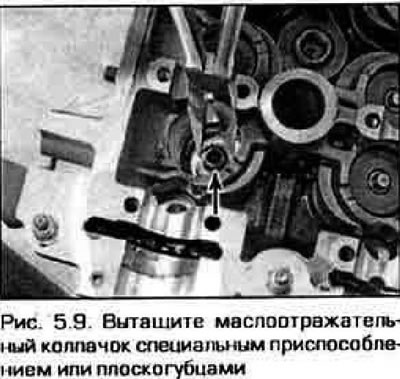
9. Note the depth of the cap in the head and pull the cap out (pic. 5.9).
10. Inspect the valve spring for cracks or other damage. Measure the free length of the spring and compare it with the value given in Technical data chapter 2B.
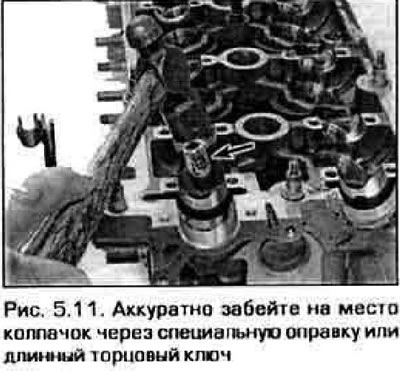
11. Lubricate the valve stem with engine oil and insert a new oil seal into its seat. Push the cap to its original depth using a special adapter or a long socket wrench (fig 5.11). Be careful. The intake and exhaust valve caps are different. The exhaust valve caps have two protrusions on the upper end. Do not confuse the caps.
12. Insert support washer and spring (pic. 5.12). Install the spring with close turns 8 to the side of the cylinder head.
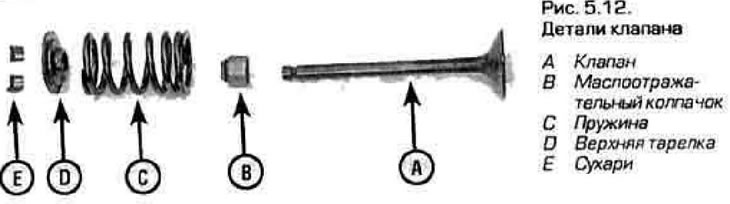
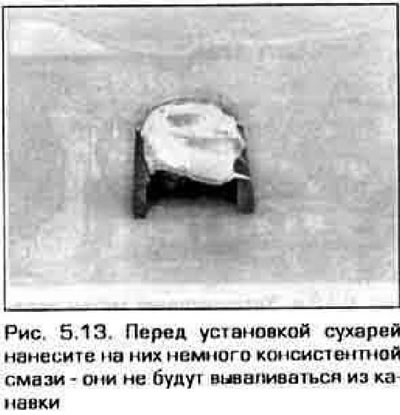
13. Install the top valve disc. Compress the spring and carefully insert the cotters into the groove of the valve stem. Apply some grease to the nuts to keep them from falling out during installation (pic. 5.13).
14. Slowly release the spring compressor making sure the nut is securely in place.
15. Turn off the compressed air, disconnect the hose and unscrew the adapter from the spark plug hole.
16. Insert the pushers and install the camshaft (see paragraph 7).
17. Establish the remained details in sequence, return to their removal.
18. Start the engine, check for leaks and unusual valve noises.
Note. On pre-1998 models, the hydraulic belt tensioners may make noise at the start. This noise should gradually disappear as the tensioners are filled.