


Contents: Removal ⇓ Installation ⇓
Caution! Allow the engine to cool completely before removing the manifold.
Removal
1. Disconnect the negative cable from the battery.
Caution: If your vehicle has a theft-protected audio system, make sure you have the unlock code before disconnecting the battery.
2. Disconnect the electrical connector from the oxygen sensor. If you are going to install a new manifold, remove the sensor and reinstall it on the new one.
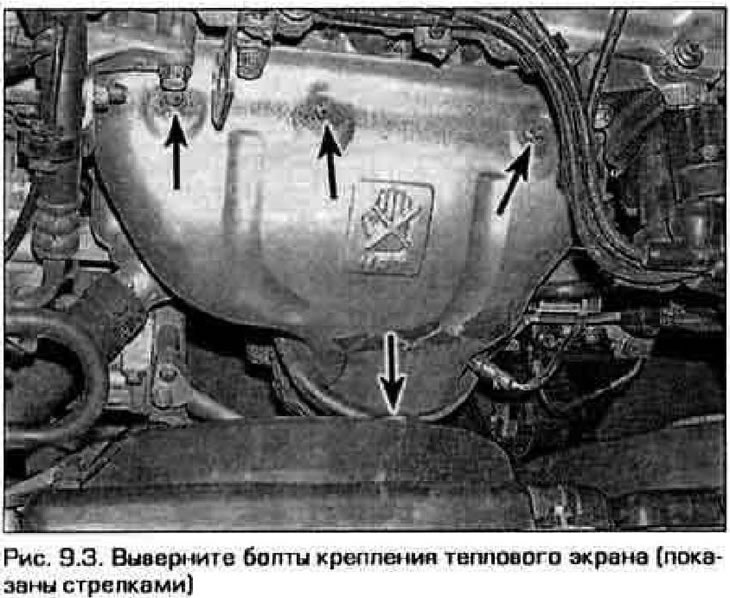
3. Loosen the bolts and remove the heat shield from the exhaust manifold (figure 9.3).
4. Moisten the exhaust manifold mounting bolts, as well as the EGR bypass pipe and exhaust downpipe mounting nuts with low-viscosity oil.
5. Raise the vehicle and support it on stands (see chapter 1).
6. Loosen the bolts securing the exhaust pipe to the engine and lower the exhaust pipe with the catalytic converter.
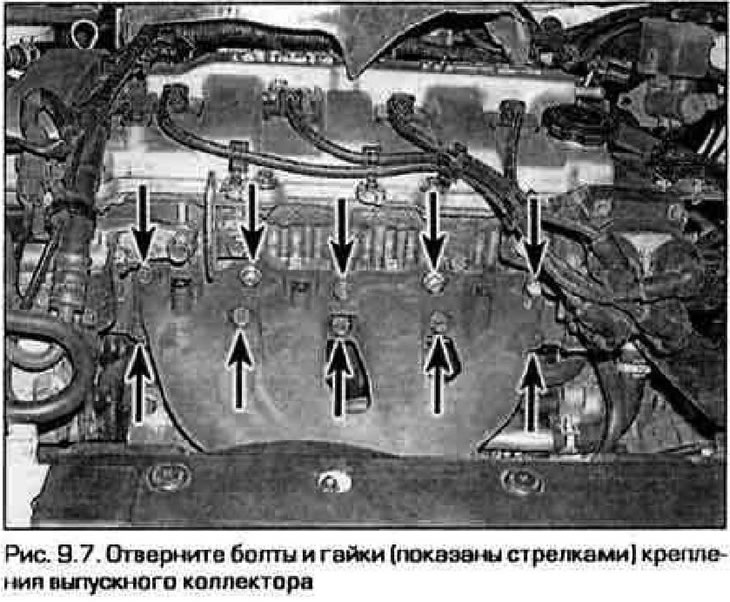
7. Loosen the bolts and nuts securing the exhaust manifold and disconnect it from the cylinder head (Fig. 9.7).
Note: If any bolts are difficult to remove, re-wet them with oil and allow the oil to soak into the threads for at least 15 minutes. If any bolts or studs break during removal, try loosening them with a self-tightening wrench after removing the manifold. If you still can't remove the broken bolt, use the tool to remove the broken bolts. To replace damaged fasteners, use only products designed for exhaust systems.
Installation
8. Scrape off any remaining old gasket and carbon deposits from the manifold and cylinder head mounting surfaces. If there were leaks from under the gasket, check that the mounting surface of the manifold is not warped. The flatness of the surface can be restored by grinding.
Caution: Use caution when using a scraper - the aluminum surface of the cylinder head is easily scratched.
9. Place the new manifold gasket onto the cylinder head studs.
10. Install the manifold in place and secure it with bolts and nuts.
11. Tighten the fasteners, starting from the middle to the edges, in several steps until the required torque is reached.
12. Install the remaining parts in the reverse order of removal. When installing the oxygen sensor, apply anti-seize compound to the threads.
13. Start the engine and check for exhaust leaks.
(Information copied from the portal: MAZBOOK)