
Note. If the master cylinder is defective, replace it. The manufacturer does not recommend repairing the master cylinder.
Removing
1. The master cylinder is located in the engine compartment and is attached to the vacuum booster housing.
2. If your vehicle has a "cruise control" disconnect the system actuator and lay it nearby.
3. In models with a manual transmission, disconnect the clutch hydraulic supply hose from the brake reservoir.
4. Remove as much brake fluid as possible from the reservoir (with a syringe or douche).
Warning. If you have used a cooking syringe, do not use it for cooking.
5. Lay a rag under the master cylinder and prepare plugs to plug the pipes.
Warning. Brake fluid corrodes paint. Cover all painted surfaces and be careful not to spill brake fluid on them.
6. Disconnect the pipelines from the master cylinder (pic. 8.6) using a ring wrench, take them aside and plug them with stoppers (to prevent pollution).

7. Disconnect the wiring connector of the low brake fluid warning light switch, then unscrew the nuts securing the master cylinder to the vacuum booster (pic. 8.7). Remove the master cylinder from the studs and remove from the engine compartment. Be careful not to spill brake fluid.

Installation
8. Before installation on the car pump over the main cylinder. To do this, secure the master cylinder in a vice, holding it by the flange.
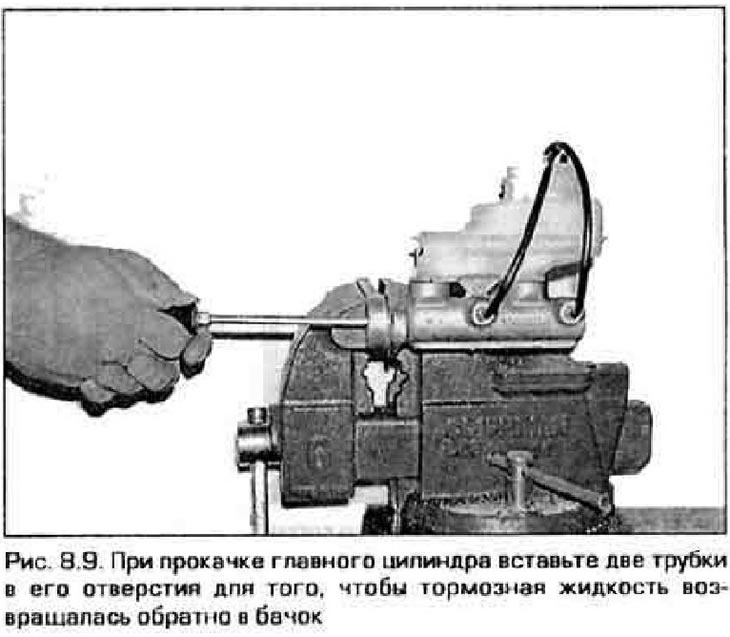
9. Insert two bleed tubes into cylinder outlets (pic. AT 9).
10. Fill the reservoir with the recommended type of brake fluid (see chapter 1).
11. Slowly push down the pistons of the cylinder (a large Phillips screwdriver is suitable for this). In this case, the air will be squeezed out of the cylinder and enter the tank. Since the tubes are immersed in the brake fluid, air will not be able to rush into the cylinder on the return stroke of the pistons.
12. Repeat this procedure until. until no more air bubbles come out of the tubes.
13. Remove tubes (in turn) and insert plugs to prevent leakage of brake fluid. Put the cap on the master cylinder reservoir.
14. Establish the main cylinder on hairpins of the vacuum amplifier and wrap nuts of fastening of the cylinder by hand.
Note. Don't forget to install a new gasket.
15. Connect to the main cylinder pipelines of brake system. If necessary, shake the main cylinder to facilitate screwing in the pipe fittings.
16. Tighten the master cylinder mounting nuts to the required torque, then tighten the pipe fittings.
17. Fill the reservoir with brake fluid, then bleed the master cylinder and brake system (see paragraph 10). To bleed the master cylinder in a car, you will need an assistant. Ask him to press the brake pedal and keep it pressed. Loosen the tubing and allow the fluid and air to escape from the cylinder. Repeat this procedure for both pipelines until no more brake fluid comes out with air bubbles from the master cylinder.
Warning. Brake fluid corrodes paint. Cover all painted surfaces and be careful not to spill brake fluid on them. After bleeding is complete, immediately remove all traces of drunken brake fluid.
18. Before driving, check the operation of the brake system.
Warning. Do not drive on the road if you are not sure that the brake system is working properly.