
Note: Always replace the piston rings with any engine overhaul.
2. To remove the piston gauge, you can use a tool specially designed for this. When removing the rings, be careful not to scratch the piston.
3. Scrape off carbon deposits from the piston crown. To complete this operation, you can use a manual metal brush or fine sandpaper. Never use a brush inserted into a drill for this chain. The piston is made of soft material and such a brush can significantly damage it.
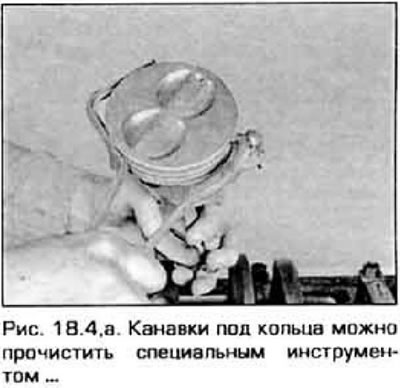
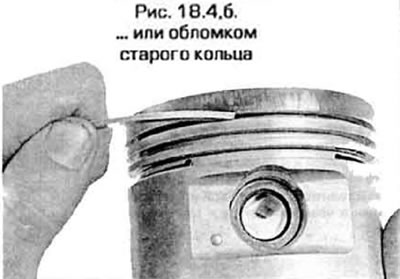
4. Clean the grooves under the ring with a special tool (pic. 18.4,a) or a fragment of an old ring (pic. 18.4, b). Carefully ensure that only carbon deposits are removed from the grooves, and not piston metal.
 |  |
5. After removing carbon deposits, wash the pistons with connecting rods with solvent and dry them, if possible, with compressed air. Don't forget to clean the oil holes in the piston grooves and in the connecting rods.
6. If traces of even slight wear are observed on the more loaded tank surface of the piston, and the compression ring in the upper groove has a small play, this condition of the piston is considered normal and it is not necessary to change the piston (if the cylinder has not been bored). However, the piston rings should be replaced anyway.
7. Carefully inspect each piston for cracks in the skirt, bosses, and between grooves.
8. Inspect the piston walls for scoring and deep scratches, and the bottom for burnouts and burns. If there are scuffs on the piston skirt, it is possible that this is the result of engine overheating due to a malfunction of the cooling system or an incorrect composition of the working mixture. Check cooling and lubrication systems. Piston crown burnouts are usually the result of incorrect ignition timing. Bottom burns usually occur during detonation. If during the inspection defects of this kind are found, it is necessary to eliminate the causes that caused them, otherwise they will reappear. The reasons may be intake manifold leaks, incorrect mixture composition, incorrect ignition setting, malfunctions in the gas recirculation system.
9. Piston corrosion, manifested as fine pitting, may be due to coolant leaking into the combustion chamber or crankcase. In this case, the cause must also be eliminated. otherwise the defect will reappear.
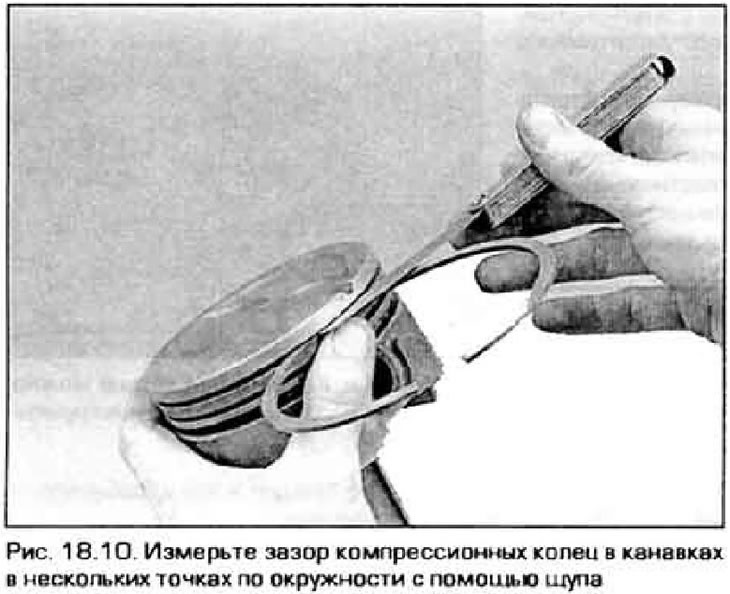
10. Measure the gaps between the rings and groove walls. To do this, insert the ring into the groove on the side and use a flat feeler gauge (pic. 18.10). Check clearance at three or four groove locations. Do not confuse the rings - they have different thicknesses. If the gap exceeds the allowable level specified in Technical Data, the piston should be replaced.
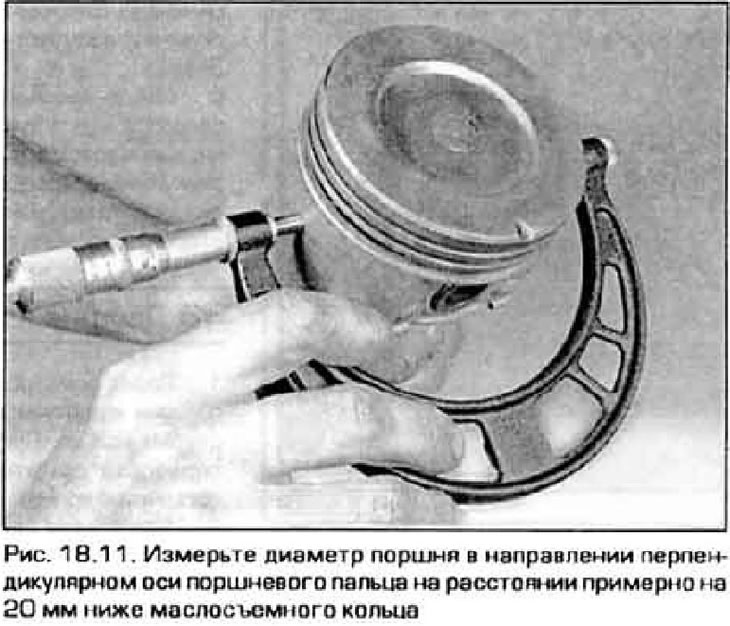
11. Check up backlashes between pistons and cylinders. To do this, measure the inner diameters of the cylinders (see paragraph 16) and outside diameters of the pistons. Measure the piston diameter on the skirt in a direction perpendicular to the axis of the piston pin (pic. 18.11). Calculate the gap as the difference between the diameters of the cylinder and piston. If the gap exceeds the allowable value, it is necessary to machine the cylinders and use pistons of the next repair size.
12. Check up a backlash in connection of the top head of a rod with a finger. trying to shake the connecting rod relative to the finger. Noticeable play means increased wear, which must be eliminated.
13. If for some reason it is required to separate the connecting rods from the pistons, it is best to do this at a service station or workshop. There, at the same time, you can check if there are any deviations in the shape of the connecting rods.
14. Measure the length of the connecting rod bolts from the underside of the head to the end of the thread. On 4-cylinder engines, the length of the bolts should not exceed 46 mm, and on V-engines - 48 mm. If the length of the bolts exceeds the specified values, then the bolts have stretched during operation and must be replaced. If at least one bolt is found to be defective, replace the entire set of bolts.
15. Examine rods on presence of cracks and other defects. Temporarily remove the lower head covers, remove the old bearings, wipe the bearing surfaces with a clean rag and check them for dents, cracks, or nicks. After inspection, reinsert the old bearings, install the caps and tighten the fixing nuts by hand.