
Note. If you don't have honing equipment or don't want to do it, most service stations can do the job for a reasonable price.
2. Before honing, replace the main bearing caps or crankcase (on V6 engine) without liners and tighten their bolts to the required torque.
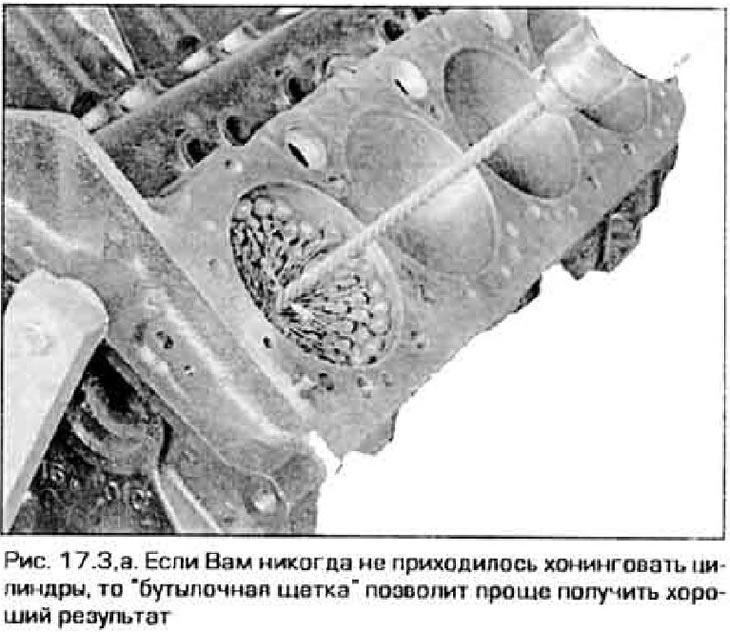
3. Cylinder honing typically uses one of two types of tool: "bottle brush" or a more traditional honing head with abrasive stones pressed by springs. Devices of both types are suitable for work, however "bottle brush" easier to use, which is especially important for an inexperienced home mechanic. You will also need some kerosene or honing fluid and an electric drill. The drill must have a constant low speed of rotation. A variable speed drill works well for this chain.
The honing process is carried out as follows:
- A) Install the honing head in the drill, tighten the bars and insert the head into the cylinder (pic. 17.3,a).
Caution: Wear safety goggles or a transparent visor.
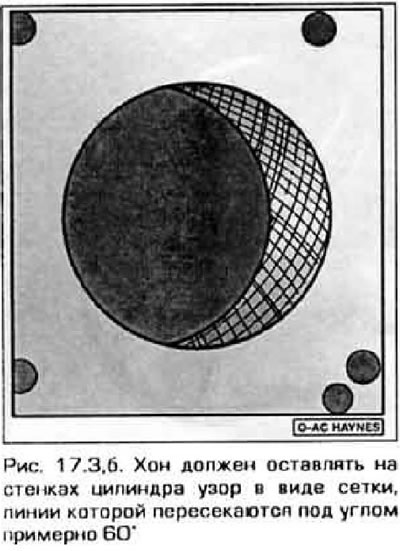
- b) Lubricate the surface of the cylinder liberally with honing fluid, turn on the drill and move the head up and down along the cylinder so that the marks from the tool form a grid on the surface of the cylinder. Ideally, the marks should intersect at an angle of approximately 60° (pic. 17.3,b). Spare no liquids. Do not remove more metal from the cylinder than is necessary to obtain the desired surface finish. Note: Ring makers sometimes recommend a grid with an intersection angle other than 60°- read and follow the instructions included with the new gauge set.
- V) Do not pull the honing head out of the cylinder while it is rotating. First turn off the drill and keep moving the head up and down until it comes to a complete stop. After that, tighten the bars and remove the head. If you are using "bottle shaky", stop the drill, then rotate the spindle in the same direction to remove the tool.
- G) Wipe any excess fluid from the cylinder surface and repeat the procedure for the rest of the cylinders.
4. After finishing honing, chamfer the upper edges of the cylinders with a fine file to facilitate the setting of the track. Do this work carefully so as not to damage the cylinder mirrors with the end of the file.
5. Wash the inside of the block again in warm soapy water to remove any traces of abrasive remaining from honing. At the same time, carefully clean with a brush all the internal channels of the block, especially oil ones.
Note. To check the quality of the flushing of the cylinders, moisten a clean, lint-free cloth with liquid light-colored oil and run it along the cylinder wall. The cylinder can be considered clean if there is no dark mark left on the rag.
6. After flushing, dry the block and coat all machined surfaces with clean oil to protect them from corrosion. Pack the unit in a large plastic bag to keep out dirt and dust, and set it aside until you start assembling the motor.