
Examination
1. Accessory drive belts are located on the front of the engine and play a critical role in the operation of the entire vehicle. The functions performed and the material of the belts determines the need for their periodic inspection. tension adjustment, and possibly replacement.
2. The number of belts installed on a particular vehicle model depends on the number of units that require a drive. These units include: generator, power steering pump, water pump and air conditioning compressor. In some cases, several units can be driven by one belt.
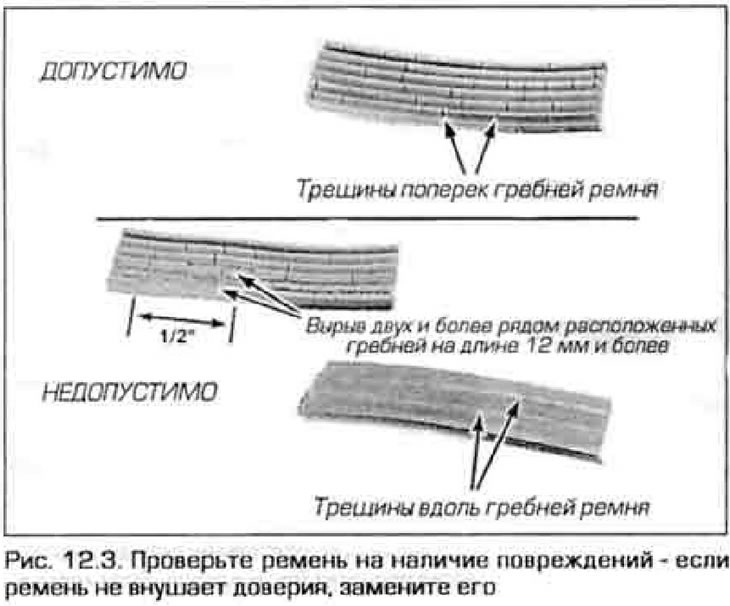
3. Stop the engine, open the hood and inspect the accessory drive belts on the front of the engine. If necessary, use a portable lamp. Feel the belts along the entire length with your hands in search of cracks and delaminations. Inspect the belts for burn marks and shiny spots (pic. 12.3). Inspect both surfaces of the belt, turning it as needed.
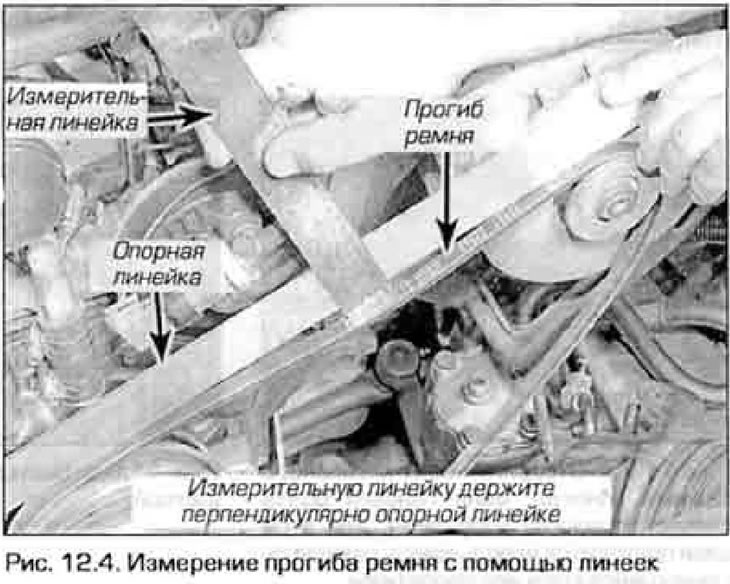
4. To check the tension of each belt, press it vigorously with your thumb between the pulleys and see how much it sags (pic. 12.4). As a rule, if the distance between the axes of the pulleys lies in the range of 180-280 mm, the belt deflection should be approximately 6.5 mm. If the distance between the pulleys is 300-400 mm, then the belt deflection can reach 12 mm.
Tension adjustment
5. On 4-cylinder models, the power steering pump and air conditioning compressor are driven by the same belt. To adjust its tension, release the coupling bolt of the gyro booster pump and the regulator locking bolt. Then turn the adjuster bolt back and forth to tighten or loosen the belt. To adjust the alternator drive belt and water pump, loosen the alternator support bolts and turn the tensioner nut.
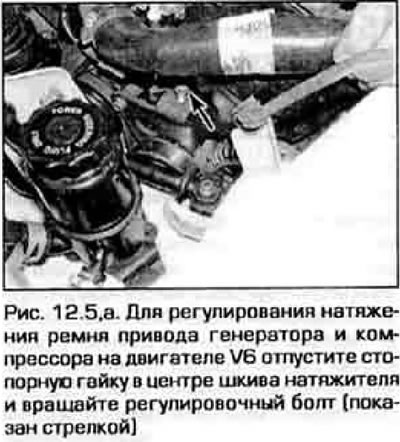 |  |
On 6-cylinder V-engine models, to adjust the alternator drive belt and A/C compressor, loosen the tensioner pulley lock nut and turn the adjusting bolt (pic. 12.5,a). The drive belt for the water pump and power steering pump is also adjustable (fig 12.5, b).
6. After adjusting the tension, measure the deflection again and repeat the tensioning procedure if necessary.
Replacement
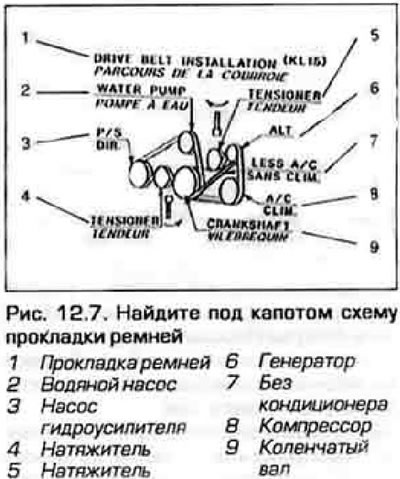
7. Loosen the belt as above and remove the belt from the pulleys. Since belts usually wear more or less equally, it is best to replace all belts at the same time. In most models, you will find a belt routing diagram under the hood (pic. 12.7).
8. When you go shopping for new belts, take the old ones with you to make sure the belts are the same. Be aware that the old belt may have stretched and the new belt may be slightly shorter. When installing a new belt, make sure that all of its crests fall into the pulley streams intended for them.
9. Install the belt in the reverse order of its removal. Tension the belt as described above in this paragraph.