


2. In most cases, you will need the following tools to replace spark plugs (it is a tall socket wrench with an insert inside for sewing up the spark plug insulator), as well as a special tool for checking and adjusting the gap between the electrodes (fig 19.2). To disconnect the high-voltage wire from the candle, there is also a special device that is desirable to use. because the tips of the wires are connected to the candles very tightly. Use a torque wrench to tighten new spark plugs. Allow the engine to cool before changing spark plugs.
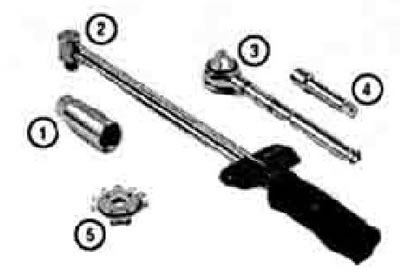
Pic. 19.2. Tool needed to replace spark plugs: 1. Candle key - has a special insert inside for sewing up the ceramic candle insulator; 2. Torque wrench - although not very necessary, it is only with its help that the candle can be tightened correctly; 3 Ratchet - a common tool for working with socket heads; 4 Extension - depending on the model, access to the plugs may not be very convenient and you may need a simple or cardan wrench extension; 5 The tool for checking and adjusting the gap in the candle is available in various modifications. When buying this tool, make sure that it includes a dipstick for your engine
3. When replacing candles, it is better to purchase a new set in advance, adjust the gaps of new candles and replace candles one at a time. When buying spark plugs, make sure the new spark plugs are suitable for your engine. The recommended spark plug type is listed in the Technical Data at the beginning of this chapter, as well as on the label under the hood. If these two sources conflict, follow the recommendations on the manufacturer's label.
4. Allow the engine to cool before removing the spark plugs. While the engine is cooling, □ check new spark plugs for defects, check and adjust the gaps between the electrodes.
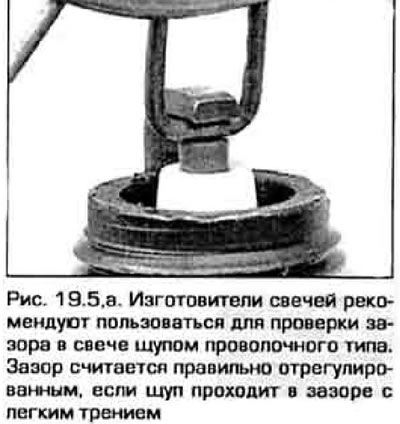
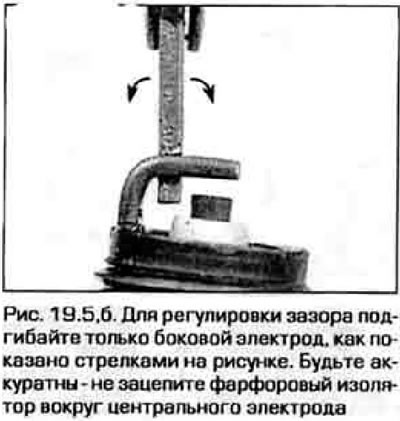
5. To check the gap, insert a feeler gauge of the desired thickness into the gap between the electrodes (pic. 19 5,a). The required gap value is indicated in Technical Data I am at the beginning of this chapter. The probe should pass between the electrodes with some friction (pic. 19 5.6). If the ground electrode is not exactly over the center electrode, fold over the LATERAL electrode. Check for cracks in the porcelain insulator of the spark plug. This candle cannot be used.
 |  |
6. Remove the high voltage lead from the spark plug as described in the next paragraph. Pull on the tip insulator only, not on the wire. If you have a special tool for disconnecting high voltage wires, use it.
7. If you have compressed air at your disposal, use it to blow any dirt out of the spark plug socket. In the absence of compressed air, you can use a conventional bicycle pump. The purpose of this action is to, if impossible, protect the engine cylinder from foreign objects entering it when the candle is turned out.
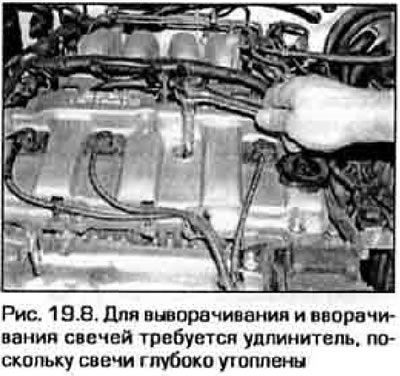
8. On the described models, the candles are deeply recessed, so to unscrew them, you will need an extension cord to the candle wrench (pic. 19.8). On V-engines, the rear plugs are particularly recessed and will require a very long (approx. 250 mm) extension cord, maybe even with a cardan joint.
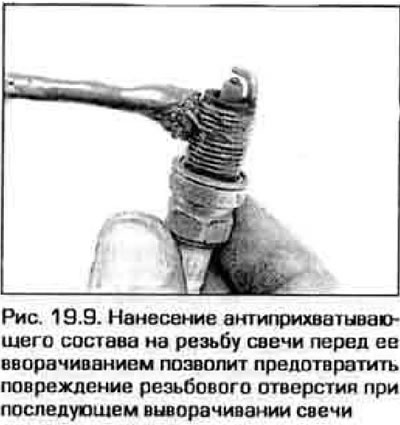
9. You return the candle. Examine the condition of its insulator and electrodes and compare them with the illustrations on the inside back cover. This comparison will allow you to judge the general condition of the engine Before installing a new spark plug, apply an anti-seize compound to the threaded part of the spark plug (pic. 19.9).
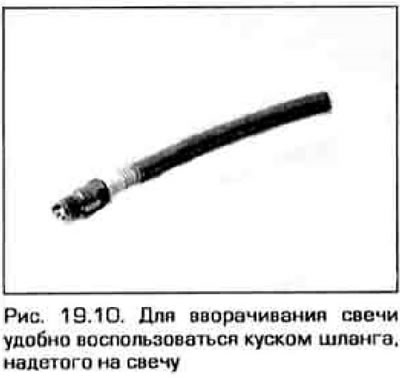
10. Screw the candle into its threaded hole, first by hand, as far as possible. In order not to spoil the thread of the candle hole. you can put a piece of hose of a suitable diameter on the spark plug insulator and screw the spark plug in by rotating the hose (pic. 19.10). If the candle went "not by carving" then the hose will simply slip through and will not allow the thread to be stripped. Then tighten the spark plug with a torque wrench.
11. Before putting a high-voltage wire on the spark plug, inspect the wire as indicated in the next paragraph.
12. Put on a candle a tip of a high-voltage wire.
13. Repeat the described procedure for the remaining candles. Replace spark plugs one at a time. so as not to mix up their high-voltage wires.