
Attention! The dust generated by the wear of brake pads may contain asbestos, which is harmful to health. Do not blow off this dust with compressed air and be careful not to inhale it. When working with brakes, it is recommended to wear a respirator or at least a gauze bandage. Do not use gasoline-based solvents to clean brake parts. Use only special fluids for cleaning brake systems. If possible, purchase asbestos-free replacement pads.
Note. More detailed photographs of the elements of the brake system are given in chapter 9.
1. It is not harmful to check the brake system at every opportunity, not just on a service schedule. Moreover, this should be done if, for some reason, the wheels are removed, as well as in case of any suspicion of a malfunction.
2. The following symptoms may indicate a potential brake system problem.
- Vehicle pulls in one direction when braking
- Brakes make noise or squeal
- Large brake pedal travel
- soft pedal
- brake fluid leak (usually on the inner surface of the rim)
3. Loosen the wheel hub nuts.
4. Raise the vehicle and place it on secure stands.
5. Remove wheels.
Front and rear disc brakes
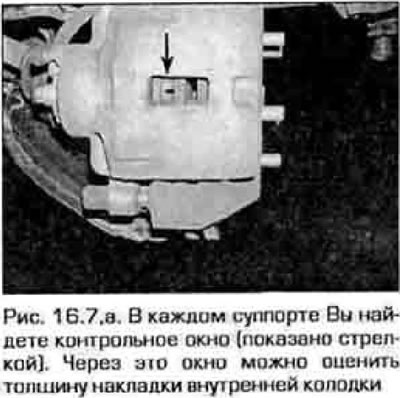
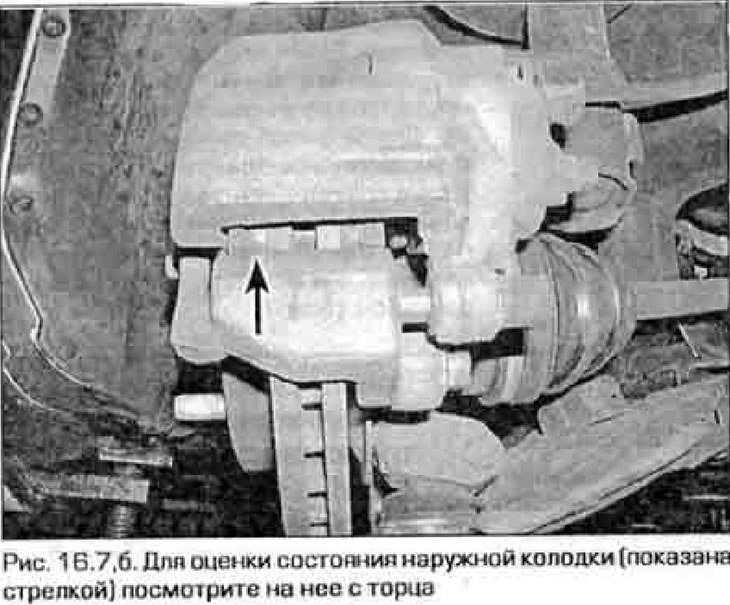
6. The brake caliper controls two servants - external and internal. With the wheel removed, both pads are visible.
7. Look at the ends of the pads and evaluate their thickness (pic. 16.7,a,6). If the thickness of the friction linings is less than the value given in the Technical data at the beginning of the chapter, the pads must be replaced.
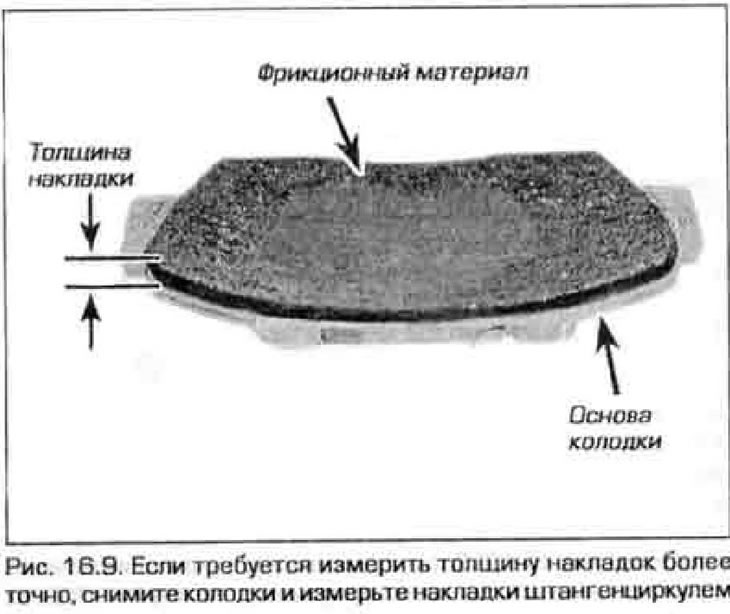
Note. Keep in mind that the pads are riveted or glued to the steel base plate. The thickness of the core must be taken into account when measuring the thickness of the overlays.
8. If it is not possible to estimate the lining thickness with a sufficient degree of certainty using the above method, disassemble the brake and remove the pads for a more reliable examination (see chapter 9).
9. After removing the pads, wash them with brake cleaner and measure the thickness with a caliper or micrometer (pic. 16.9).
10. Measure the disc thickness with a micrometer and compare the result with the value given in the Technical Data. If the disc thickness is less than acceptable, replace it (see chapter 9). If the disc thickness is within acceptable limits, check its condition. Inspect the disc for cracks, chafing, or burns. If the disc has such damage, remove it and send it in for repair (see chapter 9).
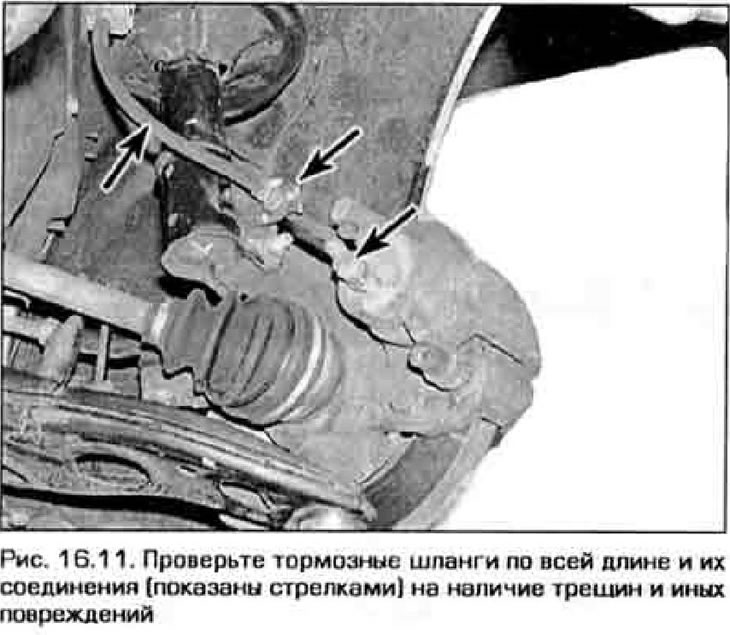
11. Before installing the wheels, inspect all brake pipes, especially rubber hoses, for damage, leaks, corrosion, creases, scuffs, etc. (pic. 16.11). Inspect the pipe connections, check the tightness of the fittings. Make sure that the pipes and hoses do not touch the suspension parts, wheels, exhaust system elements.
Rear drum brakes
12. Release the parking brake. Remove the two screws that secure the drum and knock it off the hub flange with a mallet.
13. Remove the drum. If the drum does not come off easily, moisten the center of the hub with oil and let it fill the seat between the hub and the drums. Tap with a hammer around the center of the drum. If the drum still cannot be removed, tap on the reverse side of the drum.
14. After removing the drum, clean the brake with brake cleaner
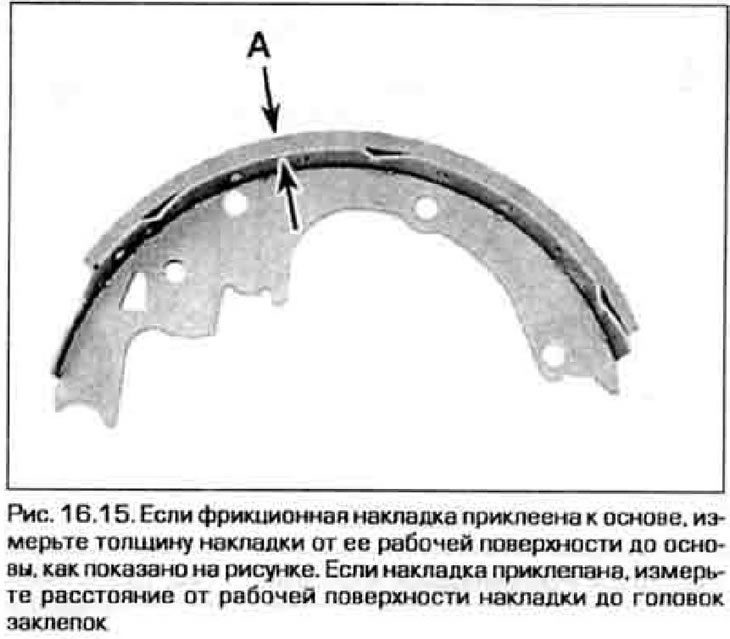
15. Measure thickness of overlays of both blocks. If there is less than 1.5 mm from the working surface of the lining to the rivet heads or less than 3 mm to the steel base of the block (if the pads are glued), then these pads need to be replaced (pic. 16.15). The pads should also be replaced if the pads have cracks, polished areas, or traces of brake fluid.
16. Make sure all brake springs are connected to their proper locations and are in good condition (see photos in chapter 9).
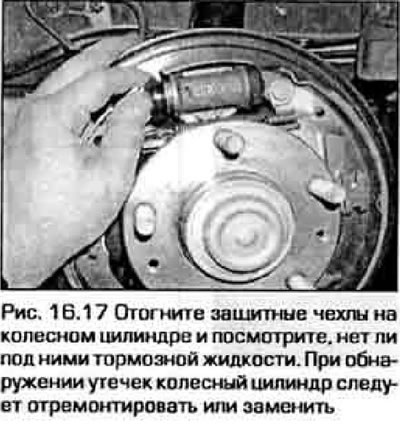
17. Inspect the brake parts for evidence of brake fluid leaks. Use your finger or a small screwdriver to pry off the protective caps on the ends of the wheel cylinders (pic. 16.17). If there is brake fluid under them, then the corresponding wheel cylinder must be replaced immediately (see chapter 9). Also check all brake hoses and their connections for leaks.
16. Wipe the inside of the drum with a cloth soaked in denatured alcohol or brake fluid. Do not spread asbestos dust!
19. Inspect the inside of the drum for cracks, tears, deep scratches, and "hard spots", visible as small areas with a different color. If the defects cannot be removed with fine sandpaper, then the drum must be handed over to specialists for repair.
20. Do the same with the second drum. If the test shows that the brakes are working, reinstall the drums and wheels and lower the vehicle to the ground.
Checking the brake servo
21. Sit in the driver's seat and do the following.
22. With the brake pedal fully depressed, start the engine - the pedal should go down a little.
23. With the engine running, press and release the brake pedal several times - the pedal stroke should not change
24. Depress the pedal, turn off the engine and hold the pedal down for about 30 seconds. The pedal should neither go down nor up.
25. Start the engine again, let it run for about a minute, then shut it off. Press the brake pedal several times - the pedal travel should decrease with each press.
26. If the brake behaves differently than described, then the servo is defective. Servo replacement procedure is described in chapter 9.
Parking brake
27. Slowly pull the parking brake lever up and count the number of clicks the lever travels until it stops completely. The brake is considered to be correctly adjusted if the number of clicks corresponds to that indicated in the Technical data at the beginning of this chapter. If the number of clicks differs from the specified, then the brake drive is alienated in the adjustment (see chapter 9).
28. Another way to check the parking brake: stop the car on a steep slope, apply "neutral" in the transmission and apply the parking brake. If the parking brake does not hold the vehicle on a slope, then it needs to be adjusted (see chapter 9).